3D 프린터의 장점은
부속을 출력하여 사용할 수 있다는 것이다.ㅎ
부품을 출력하여 최소한의 비용(볼트/너트 정도)으로 이것저것 업그레이드를 할 수 있다.
나는 현재 상태로도 기존 프린터에 비해 만족도가 너무 높고,
업그레이드로 인한 사이드 이펙트를 최소화 하기 위해
조립하자마자 아래의 부품을 출력하였다.
1. 베드 강화
준비물 : 드라이버, M4 20mm 볼트/너트
기본 Ender 5는 베드를 지지하는 z축이 한 쪽에만 있기 때문에 반대쪽은 심하게 흔들린다.
아래는 레벨링할 때 명함을 넣는 것 만으로도 흔들림을 확인할 수 있다.
thingiverse에서 아래 링크의 베드지지대가 상위 순위에 있어서 다운받았다.
https://www.thingiverse.com/thing:3479330
Ender 5 bed supports (The Original "Super Struts") by jumpshoutmedia
Update: 3/15/20 - (PLA) Material Warning! Due to a number of reports from users who have printed their struts out of PLA having issues with cracking.. I dug in and did a bunch of testing, using various brands and colors of PLA. After MANY hours of testing
www.thingiverse.com
근데 다른 분들을 보니 너트를 고정시켜주는 업그레이드 버전이 있더라. 그것은 아래 링크!
결합하다보면 너트 고정이 힘드니 아래 링크를 추천한다.
https://www.thingiverse.com/thing:3661405
Ender 5 bed supports - Super Struts Remix by BoothyBoothy
This is a remix of jumpshoutmedia`s excellent Super Struts support for the Creality Ender 5. This was already a brilliant thing but I tweaked a few details to make the installation a little easier. In this remix I have: 1.Included nut retention sockets to
www.thingiverse.com
자 그럼 출력 시작!

결과물은!

볼트/너트는 추후 사용할 일이 많을 것 같아서 아래 링크로 주문했다.
가성비도 괜찮은 것 같고.. (흑색 세트도 있으니 둘러보고 구입하는 것도 괜찮다.)
M3~M5 육각렌치볼트+너트+와셔 18종키트
위엘이디
weled.co.kr
장착하면 이렇게 된다.

설치를 했으니 확인해 봐야지!ㅎ
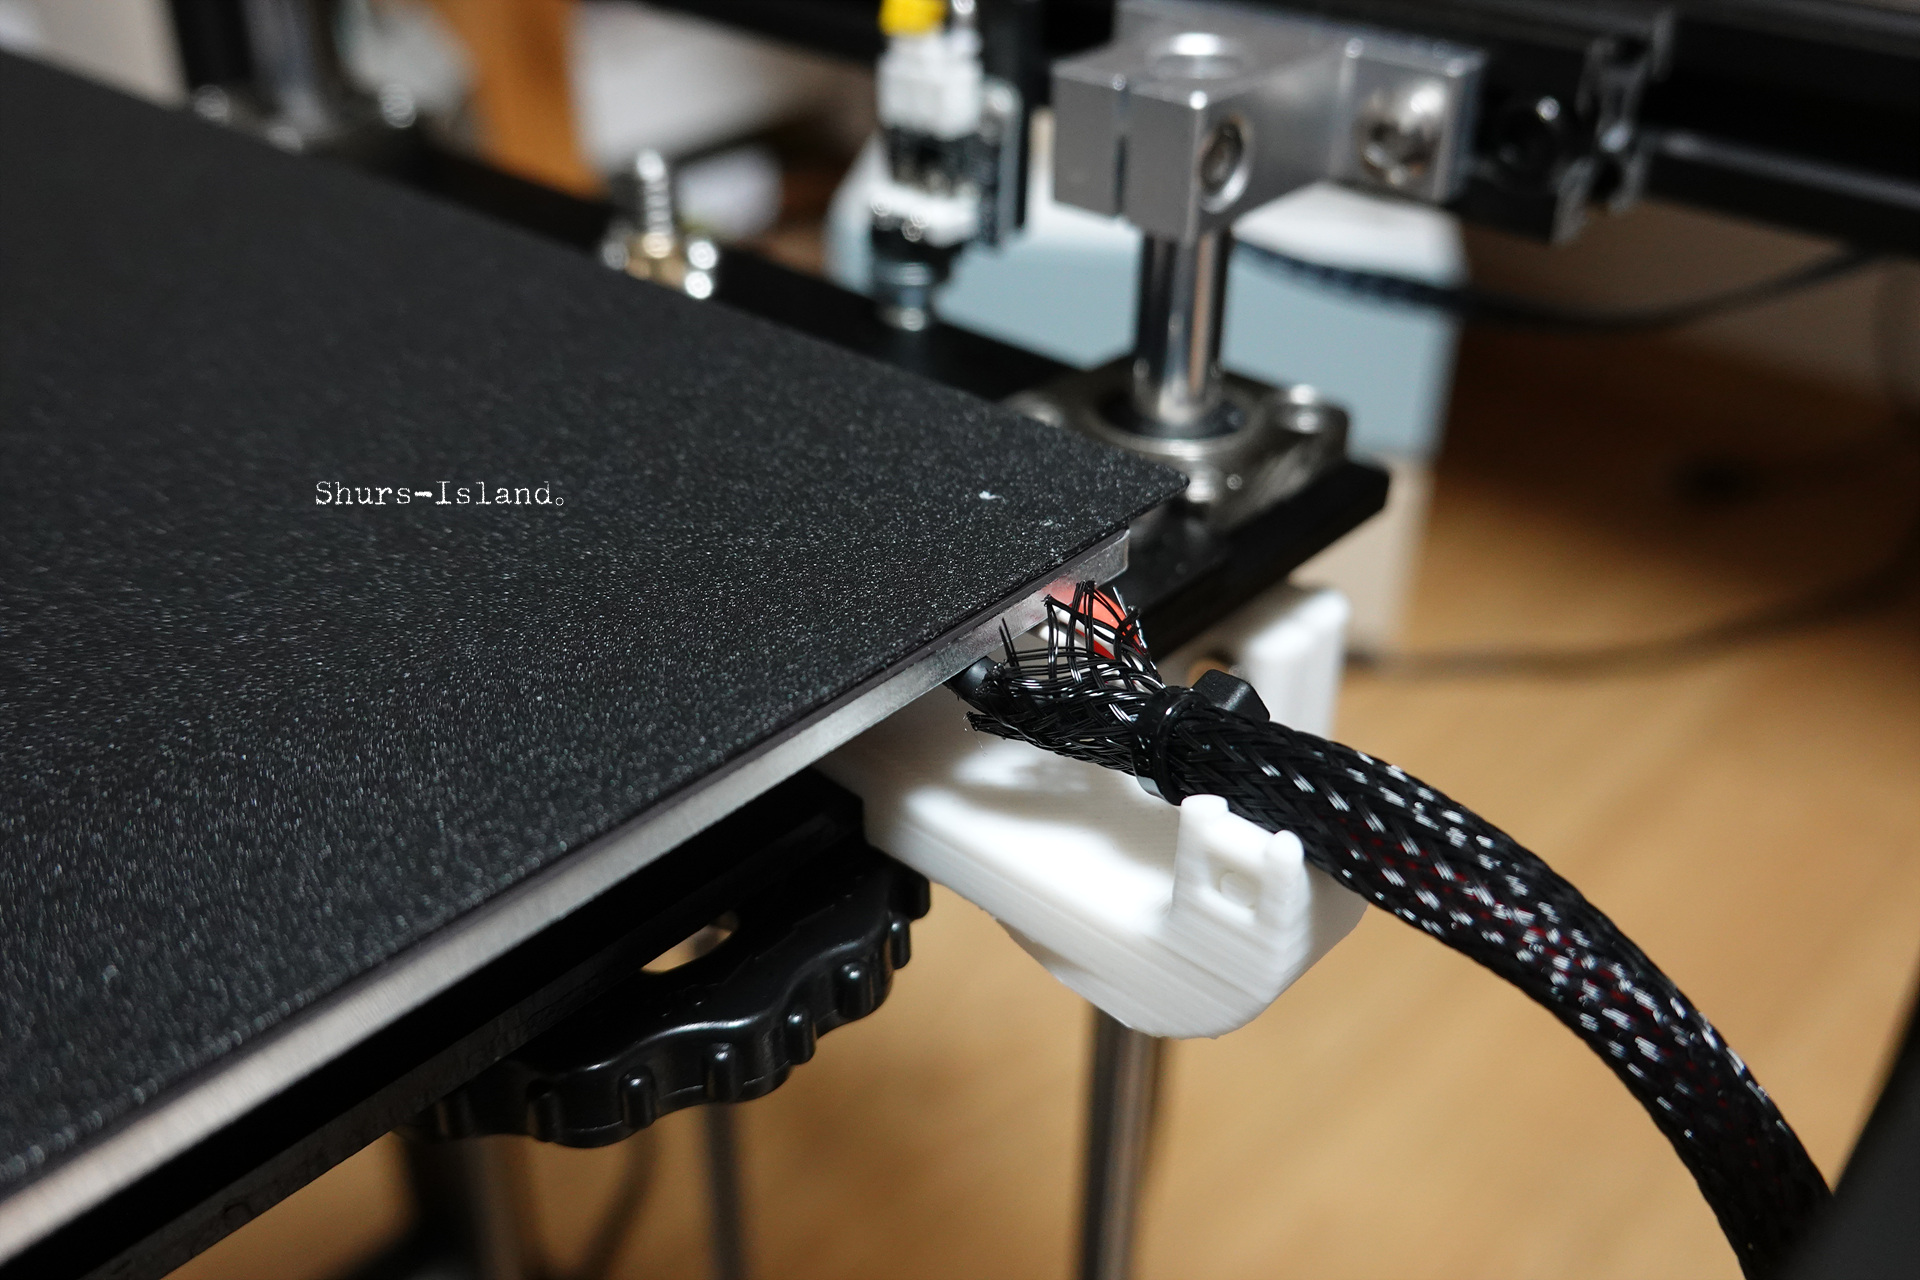
2. 베드 선 지지대
베드는 아래위로 움직이기 때문에 베드에 붙어있는 선은 계속 움직일 수밖에 없다.


선 지지대를 해주면 먼가 잘 안떨어질 것 같은 안정감이 있을 것 같아서 출력해 봤다.
https://www.thingiverse.com/thing:3443100
Ender-5 Bed Strain Relief by derandi3d
Strain relief for the Ender 5 heat bed wires. Mounted to the carriage using M4x12 or M3x12 + nut. 23.2.2019 Version 2 To avoid too much bending the wires if you level up and down higher than normal, i made some changes: 5mm more distance from bed. Larger r
www.thingiverse.com
이것 역시 리믹스 버전이 있다. 차이는 장착시에 볼트너트가 필요한 것과 필요없는 차이!
나는 아래 링크를 다운 받았다.ㅎ
https://www.thingiverse.com/thing:3669438
Ender 5 Bed Strain Relief - Improved by grizzlyeric
Improved version of the already excellent strain relief designed by derandi3d. Improvements come primarily in the reduction of stress risers at the interface to the bed. I also removed the bolt and tailored the gap for a snug friction fit on my bed. You ma
www.thingiverse.com


이 것은 볼트 너트 필요없이 쓱 끼면 된다. 장착 샷!

3. 스풀 클램프
출력을 하다보면 필라멘트가 돌아가면서 옆으로 떨어질 것 같을 때가 있다.
턱이 있긴 한데 낮아서 살짝만 쳐도 떨어진다.
thingiverse에 찾아보니 역시나 있다.ㅎㅎ
https://www.thingiverse.com/thing:3478552
Ender 5 spool clamp by D_jespersen
to hold your spool in place. let me know if you want another with. If you like my design feel free to tip my designhttps://www.paypal.me/Djdenzo
www.thingiverse.com
출력샷은 따로 없고 장착샷만 있다.


지금은 출력 중이니 끝나면 다시 해줘야겠다ㅋㅋ
- 그 외
팬 덕트 같은 것들도 많이들 하시는데 아래링크를 출력은 해봤으나 내부 서포트를 제거하지 못해서 실패하였다.
https://www.thingiverse.com/thing:3855884
Ender 5 Cooling Duct by McGybeer
After trying several designs, I've found Mistral-E Cooling Duct (https://www.thingiverse.com/thing:3255518) which worked perfectly on my Ender 5. Still, it had some room for improvement, so I did it trying to keep the good performance: Raised the duct 1mm,
www.thingiverse.com
큐라에서 서포트 설정도 조정해줘야되는데 잘 못찾겠다.
현재는 출력이 잘 되고 있으니 나중에 문제가 생기면 또 시도해봐야겠다.ㅎ
- 끝 -
'3D Print。' 카테고리의 다른 글
| Ender 5 - chamber(챔버) (0) | 2020.03.20 |
|---|---|
| Ender 5 - 보드 업그레이드 (0) | 2020.03.17 |
| Ender 5 (0) | 2020.03.14 |
| Chamber 만들기 - 1。 (0) | 2019.05.03 |
| 어고독스(ergodox) keyboard - 2。Case (0) | 2019.03.12 |


